Working a repair order, tab by tab
What each tab of the order screen is for — services, summary, inspections, time, parts and files — and how to send it, take a payment and refund one.
For owner, manager, service advisor · checked against the product on 2026-11-03
Open a repair order from the board or from Orders. The tabs under the car and the customer split the work into the pieces below, and the question mark beside them opens the steps for the tab you are on.
Add a service
Step 1: Search your menu
On Services, type in Search All Services and pick a canned service.

Step 2: Or make a new one
Press New Service, type the Service name and press Add service.
Step 3: Fill in its labor and parts
Each service is a card with its labor and parts. The service card explains every part of it.
See the order at a glance
Step 1: Open Summary
Press Summary.
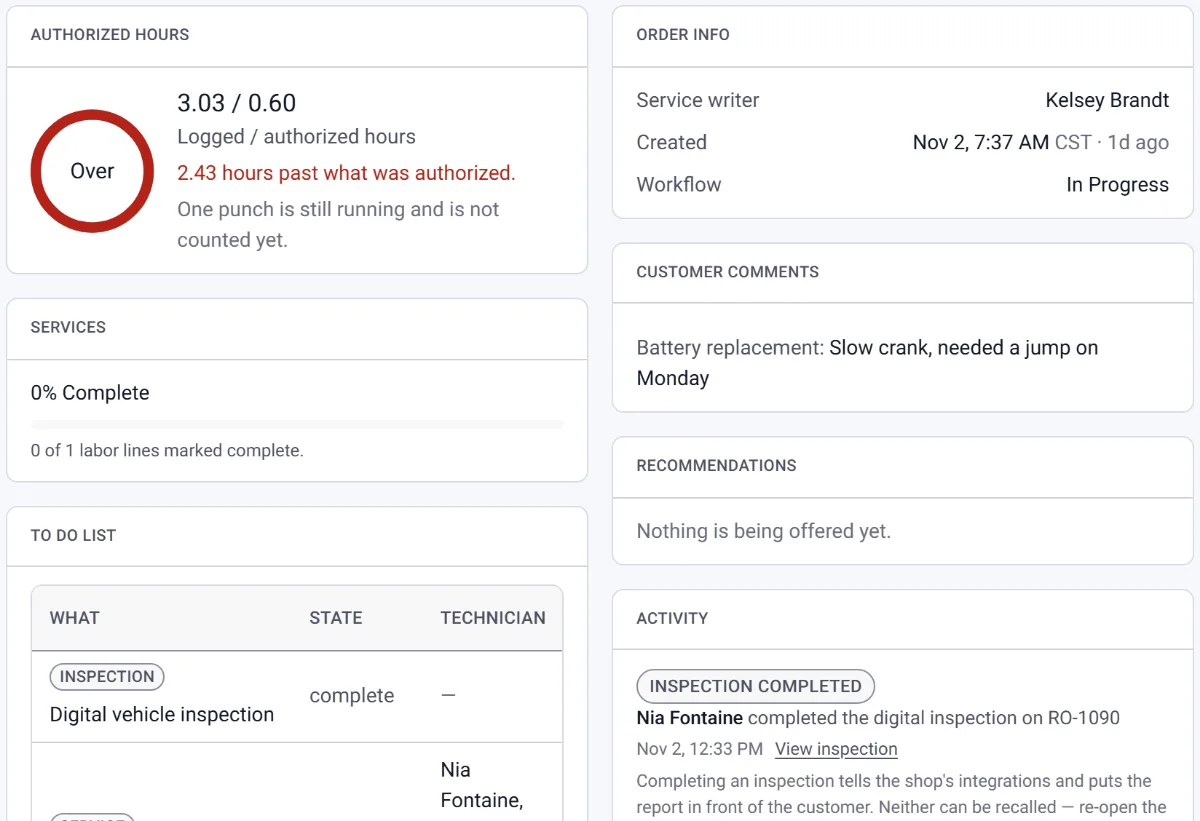
Step 2: Read how far along it is
Authorized hours and Services show the work done against the work approved; the To do list says what is left.
Step 3: Read what the customer said
Customer comments and Recommendations are on the same page.
Start an inspection
Step 1: Press Add inspection
On Inspections, press + Add inspection.
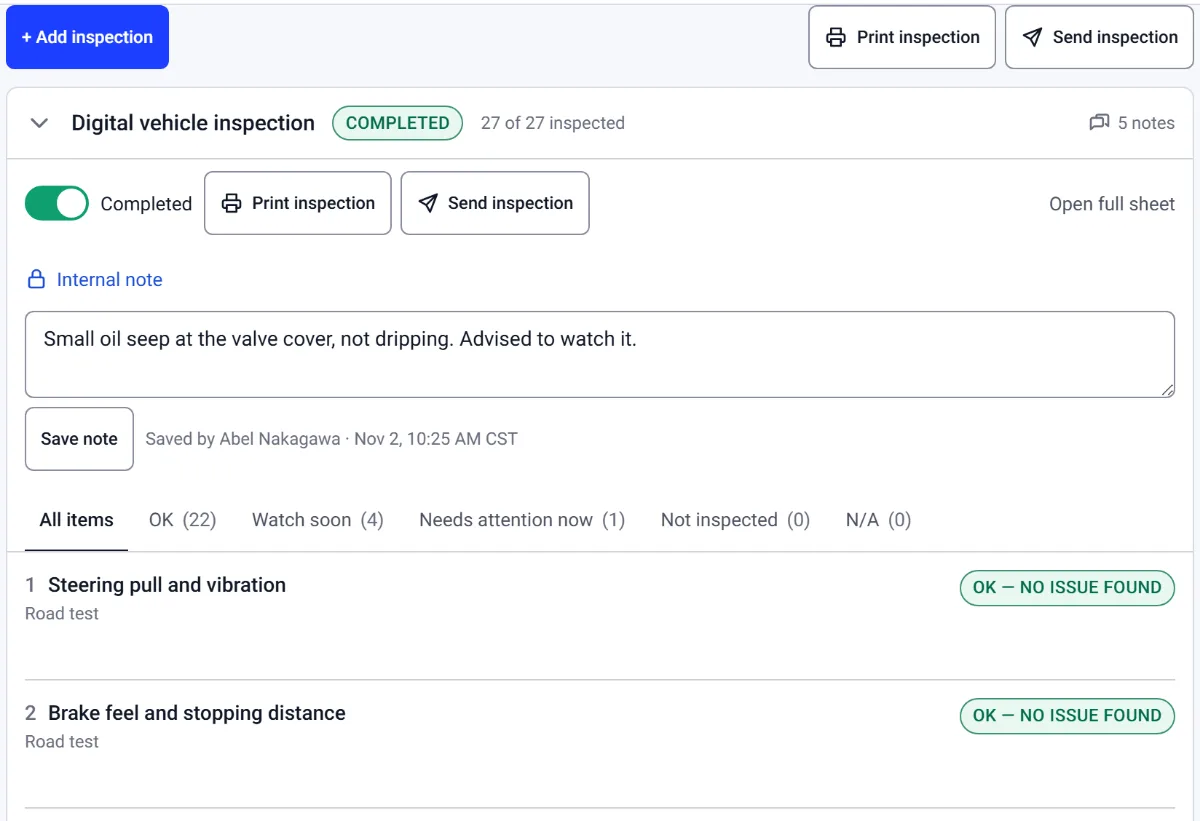
Step 2: Pick the checklist
Choose the checklist and the number of wheels, then press Add inspection.
Step 3: Rate it, then send it
Rate each item and add photos. When it is done, press Send inspection.
Clock time on the order
Step 1: Open Time
Press Time. Each person on the order has a card.
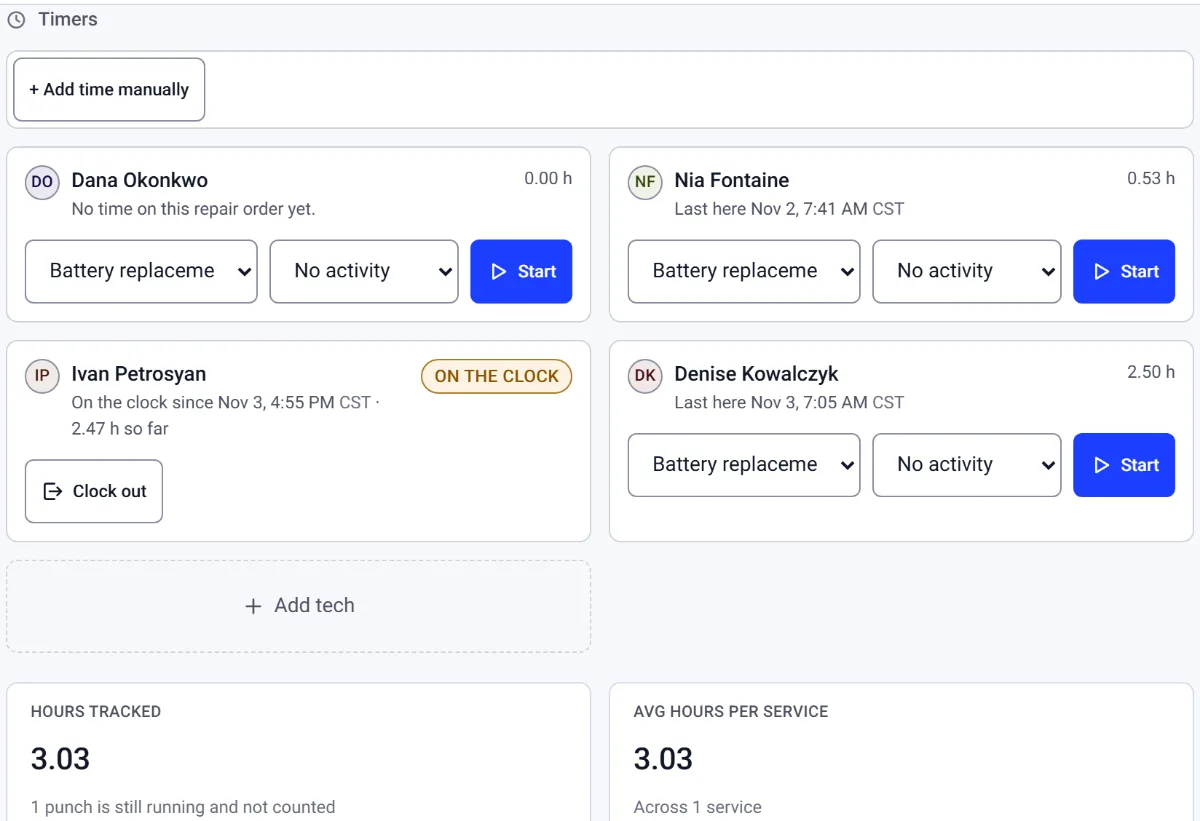
Step 2: Pick the service and press Start
Choose the service on your card and press Start. Press Clock out when you stop.
Step 3: Forgot to clock in?
Press + Add time manually, fill in the time and press Add time.
Order the parts
Step 1: Open Parts
Press Parts. Every part on the order is listed with its status.
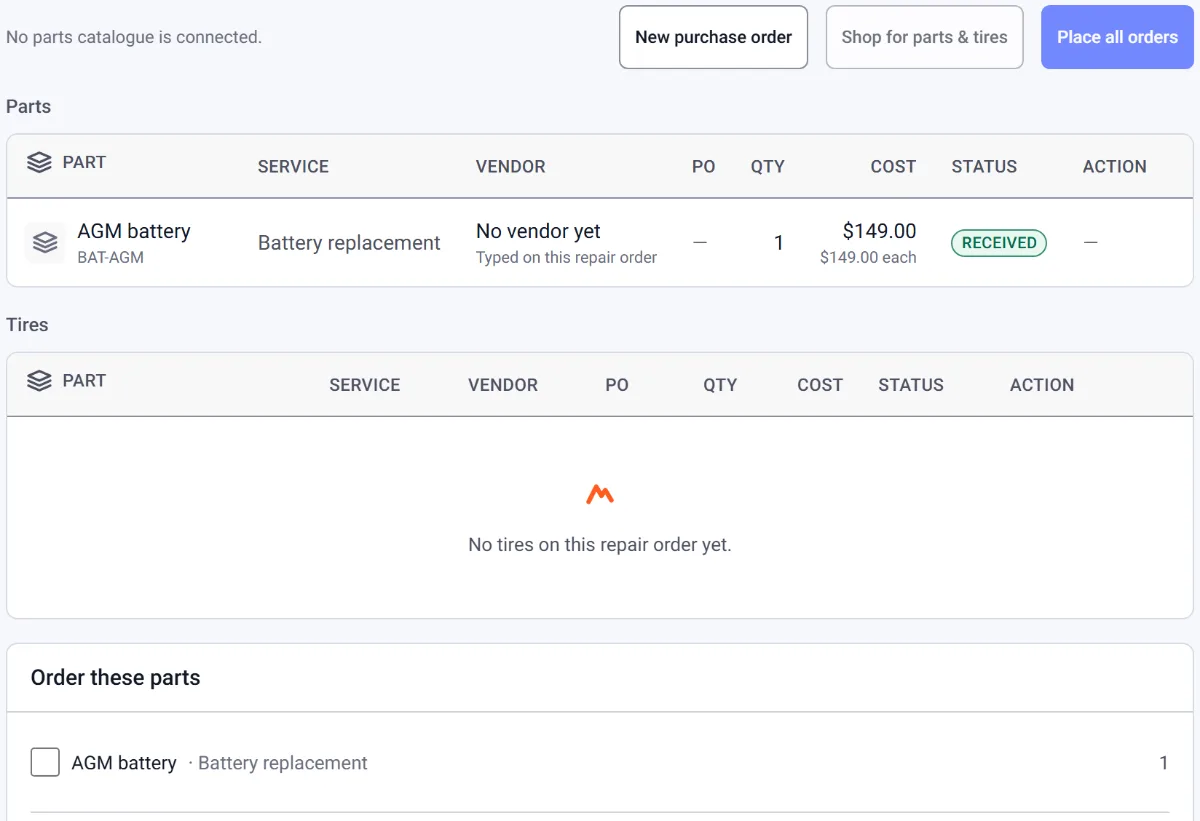
Step 2: Put them on a purchase order
Press New purchase order, or Place orders when drafts are waiting.
Step 3: Receive them
When the delivery comes, receive it on the purchase order. Parts, purchase orders and receiving has the steps.
Attach a photo or a file
Step 1: Open Files & photos
On Services, open Files & photos at the foot of the tab.
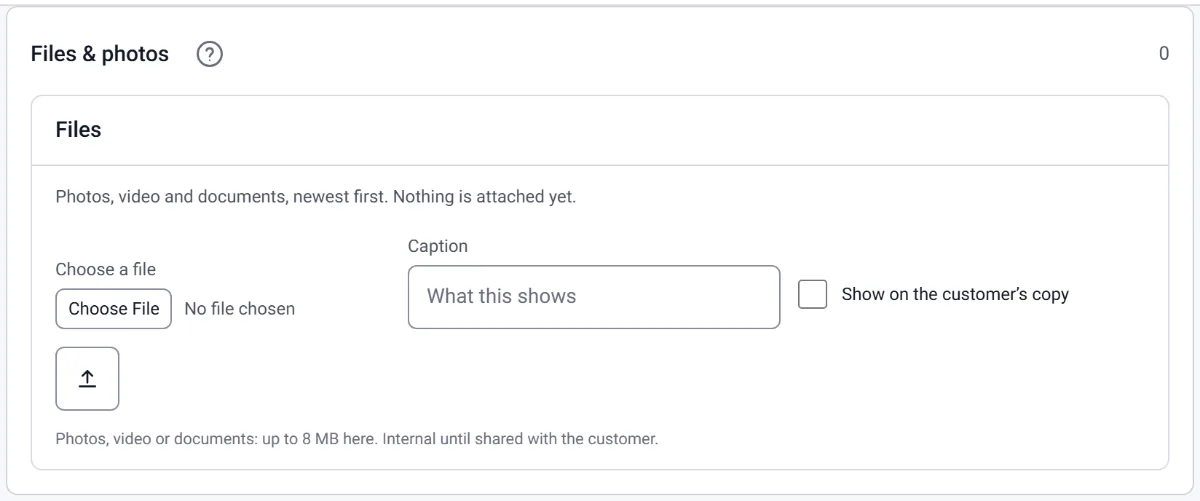
Step 2: Pick the file
Press Choose a file and add a Caption that says what it shows.
Step 3: Choose who sees it
Tick Show on the customer’s copy only for a picture the customer should get, then press the upload button.
Send it to the customer
Step 1: Open Send
Press Send at the top of the order.
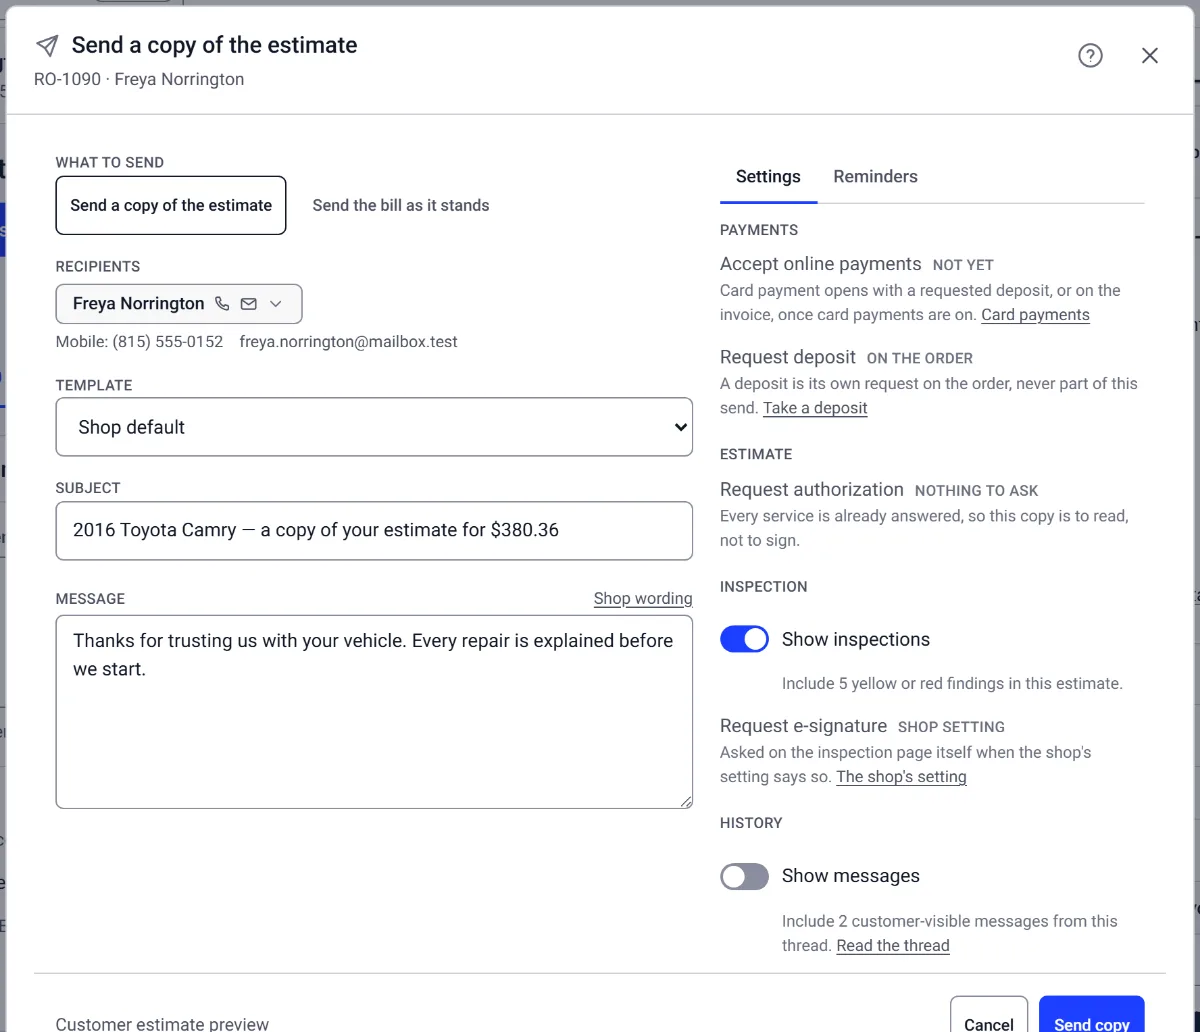
Step 2: Choose how it goes
Text and email, Text only or Email only. A text goes from the number set in Text messages.
Step 3: Choose what it asks for
Leave Request authorization on to ask for a yes. A deposit is asked for on the order once work is approved, never in this send.
Step 4: Send it
Press Send for approval. The customer gets a link to approve on their phone.
Take a payment
Step 1: Open New Payment
On an invoiced order press New Payment, or press Take payment on Invoices.
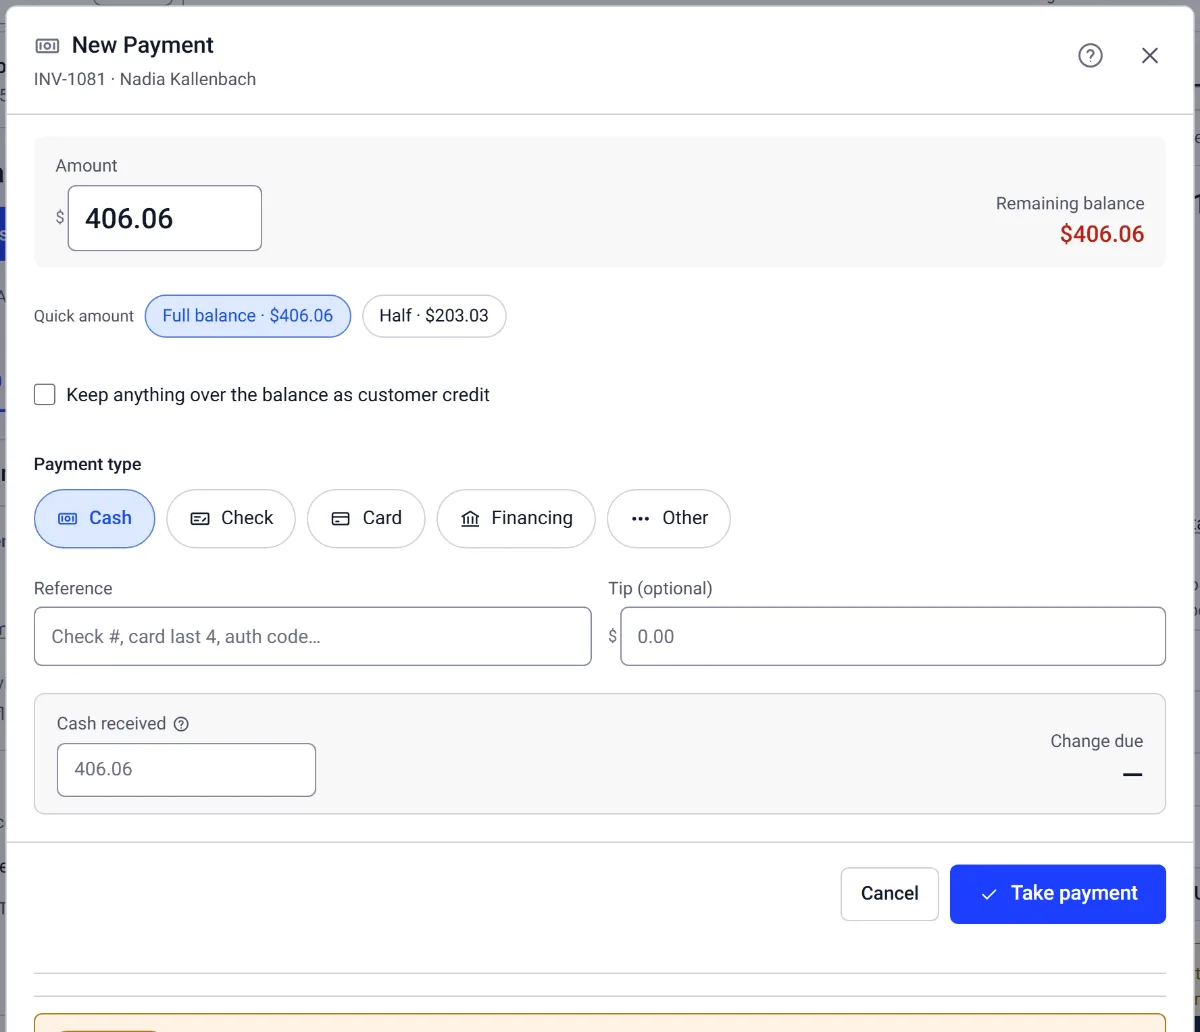
Step 2: Check the amount and pick how they paid
The amount starts at the balance. Choose the Payment type, and type a Reference for a check or a card machine.
Step 3: Press Take payment
Press Take payment. It shows under Payments & Transactions at once.
Refund a payment
Step 1: Open Payments & Transactions
On the order, open Payments & Transactions on the right.
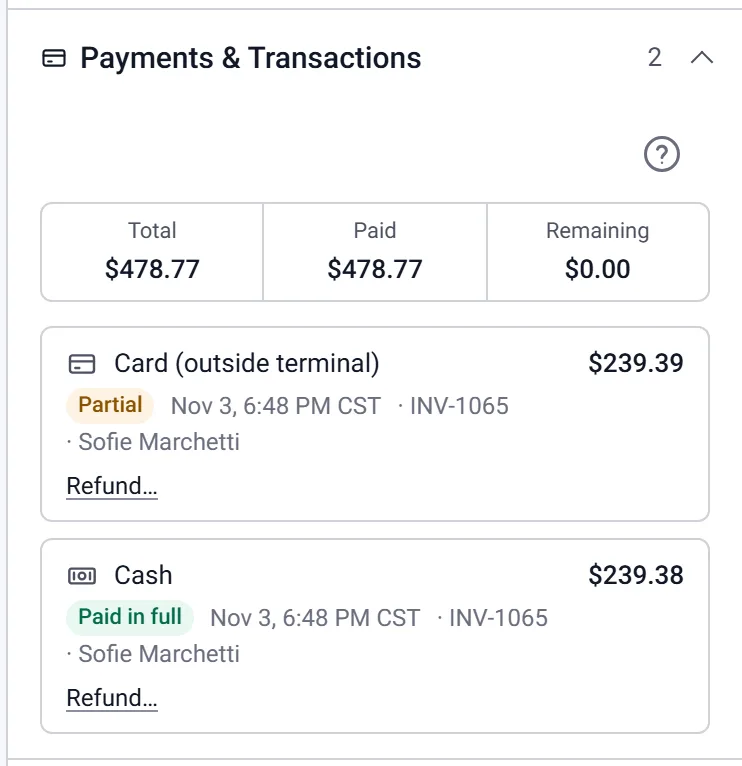
Step 2: Press Refund beside the payment
Press Refund… and give the amount and a reason.
Step 3: Choose where it goes
Pick Money back or Customer credit and press Record refund. A card paid through Torqix goes back with Refund card.