Taking arrival photos when a car is dropped off
Walk round the car one photo at a time on your phone, mark the damage that was already there, tap through fuel, mileage, warning lights and keys, and keep a record nobody can change afterwards.
For service advisor, technician, owner · checked against the product on 2026-11-03
Take the arrival photos
Step 1: Start them from the order
Open the repair order and press Start arrival photos. The screen asks for one side of the car at a time.
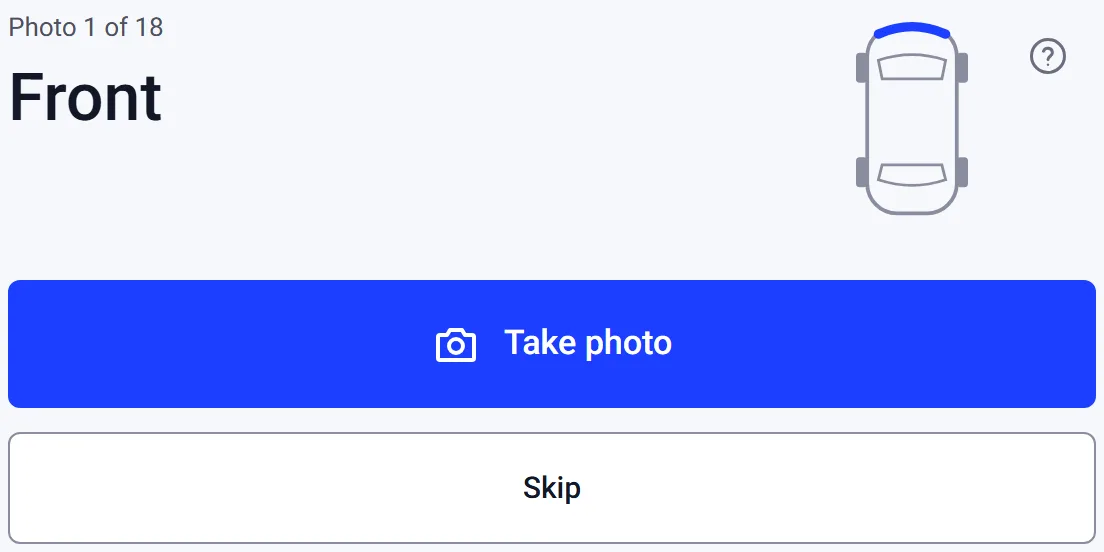
Step 2: Take each photo
Press Take photo, then go on to the next side. A side you cannot take can be skipped.
Step 3: Mark any damage
Press Mark damage on a photo and tap the spot. Spot damage asks the shop's AI to look, when an AI that can read photos is connected; when none is, the button says so.
Step 4: Finish the checklist
Answer the checks at the end and press Complete.
How the walkaround works
Open the order and press Arrival photos at the top, or pick Arrival photos in a card's menu on the board. On a phone the walk fills the screen and asks for one photo at a time: Front, Left side, Interior front, Dashboard and the rest, with a small drawing of the car showing which part to shoot. The strip at the top counts how many are done, such as 7 of 18.
Step 1: Take each photo
Press Take photo and the camera opens. The photo saves on its own. Use Retake if it came out blurred, Add another of this side for a second angle, then Next.
Step 2: Skip what you can't shoot
Press Skip. A skipped photo shows as Skipped on the record, never as missing. Anything you never reached is written down as Skipped when you complete. Got what you need? Press Skip the rest to go straight to the checklist.
Step 3: Mark damage that was already there
Under a photo press Mark damage, tap the photo where the damage is, then pick a word: Scratch, Dent, Chip, Crack, Scuff, Missing or Other. A short note is optional. The mark sits over the photo; the photo itself is never altered.
Step 4: Or let the AI spot it
Under a photo press Spot damage. Suggested marks show as dashed circles. Press Keep on each one that is really there and Dismiss on the rest. Only the marks you keep go on the record. If no AI model that can look at photos is connected, the button says so and suggests nothing.
Step 5: Tap through the checklist
Mileage in, fuel level, warning lights on, keys received, valuables, wheel locks and whether the customer was there. Each is a tap. Not checked is an answer too. Mileage starts from the order's Mileage In, and fills it in if the order had none. Leave it alone and the record keeps the order's number.
Step 6: Complete
Press Complete. The order and the vehicle each show a short Arrival card with the time in your shop's time zone, who took it, small photos with a damage badge, and the answers you gave. The full list is on the record.
Sending the photos to the customer
On a completed arrival, press Send arrival photos. It goes by text if the customer has said yes to texts, otherwise by email, and the screen says where it went. Nothing is sent unless you press it. The customer sees the photos, the damage marks and the checklist answers, but never your notes. Once sent, the arrival also stays listed on that car's page in their glovebox, for as long as the car is theirs.
The car's history, and pickup photos
Every completed walkaround stays with the car. Open the vehicle and its History tab lists them newest first. On a completed record, Pickup photos walks the same photos again when the car leaves, and the record then shows arrival and pickup side by side for each one. Print view prints the record. The repair order and the work order also carry a short Arrival section with the time, the checklist answers and how many damage marks there are; clear Include arrival in the print menu to leave it off.
Choosing the photos, and making them required
Step 1: List the photos
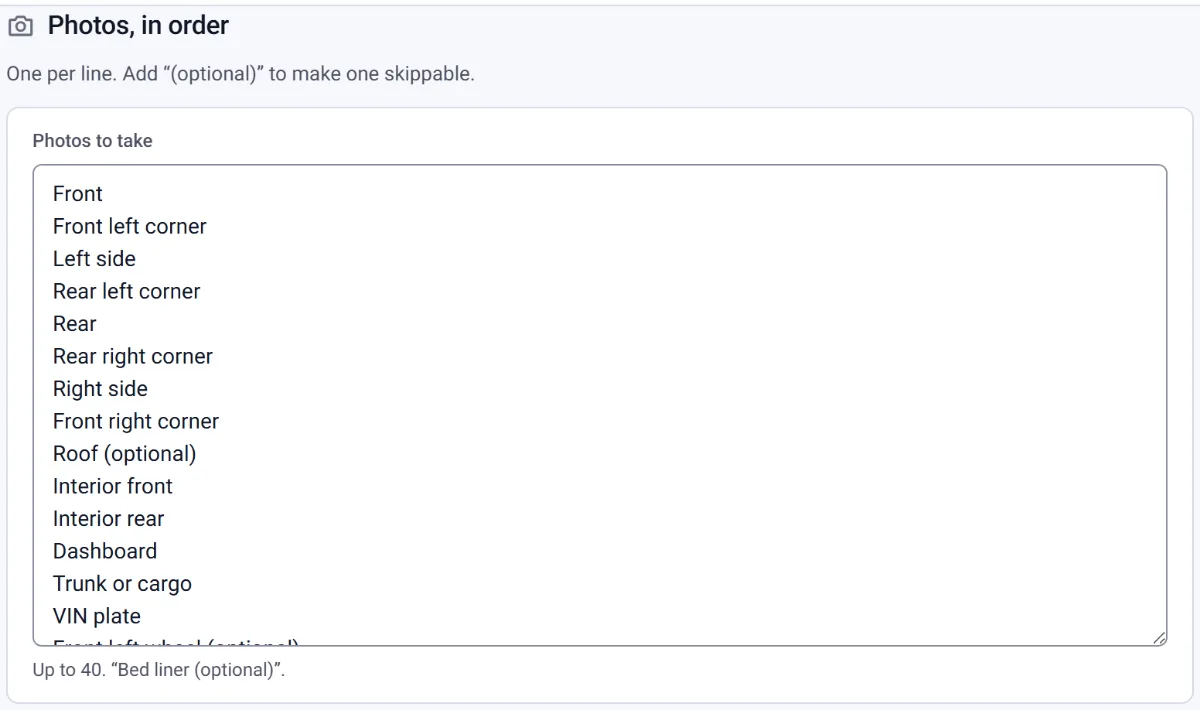
In Settings › Arrival photos, type one photo per line under Photos to take, in the order you walk round. Add (optional) to one that can be skipped.
Step 2: Add your own checks
Type any yes or no questions under Extra checks.
Step 3: Press Save walkaround
Press Save walkaround.
In Settings › Arrival photos, list the photos one per line in the order you walk round. Add (optional) to one that may be skipped without a second thought, and add your own yes or no checks below. A walk already started keeps the list it began with. To make the walkaround a step before work, tick Require arrival photos before work starts in Settings › Order checklist. It is off until you turn it on; when it is on, an order can't move to Work in progress until its arrival photos are completed.